
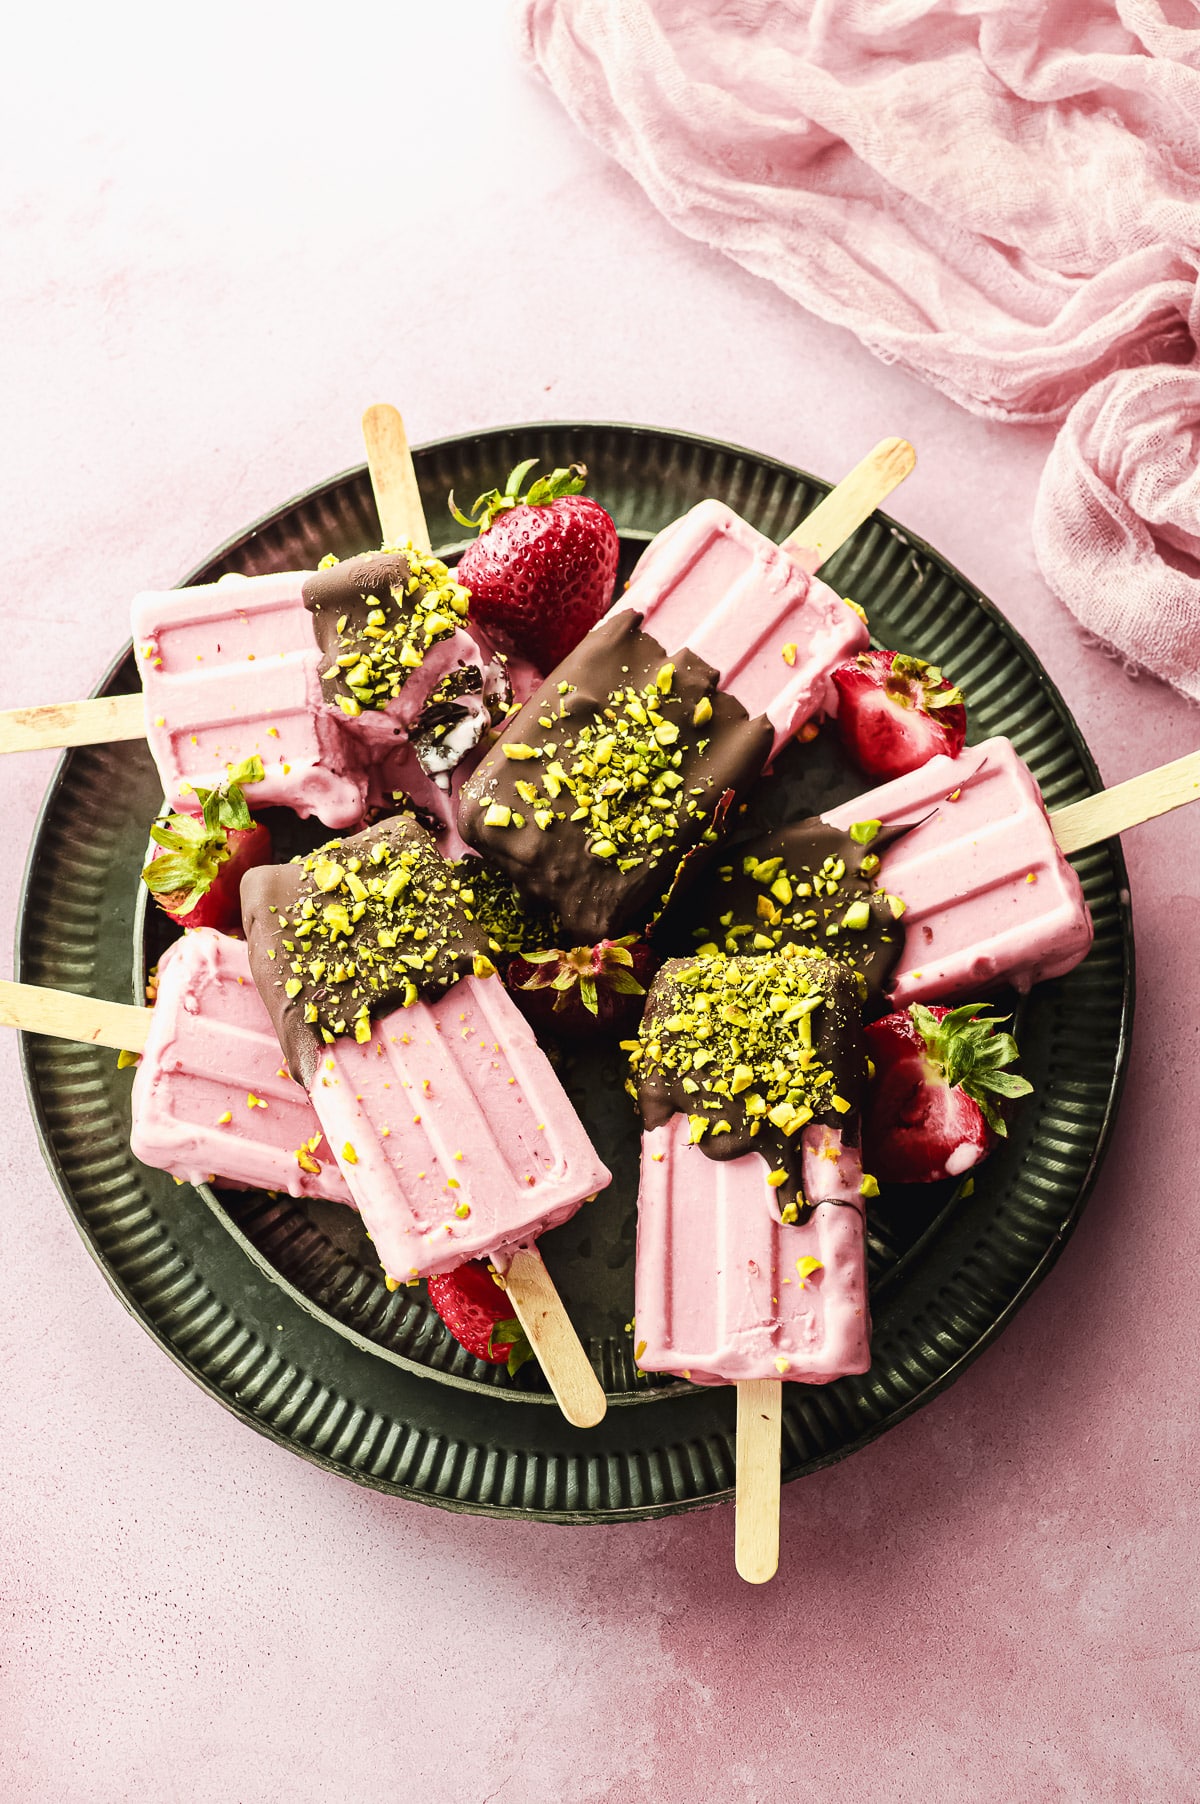
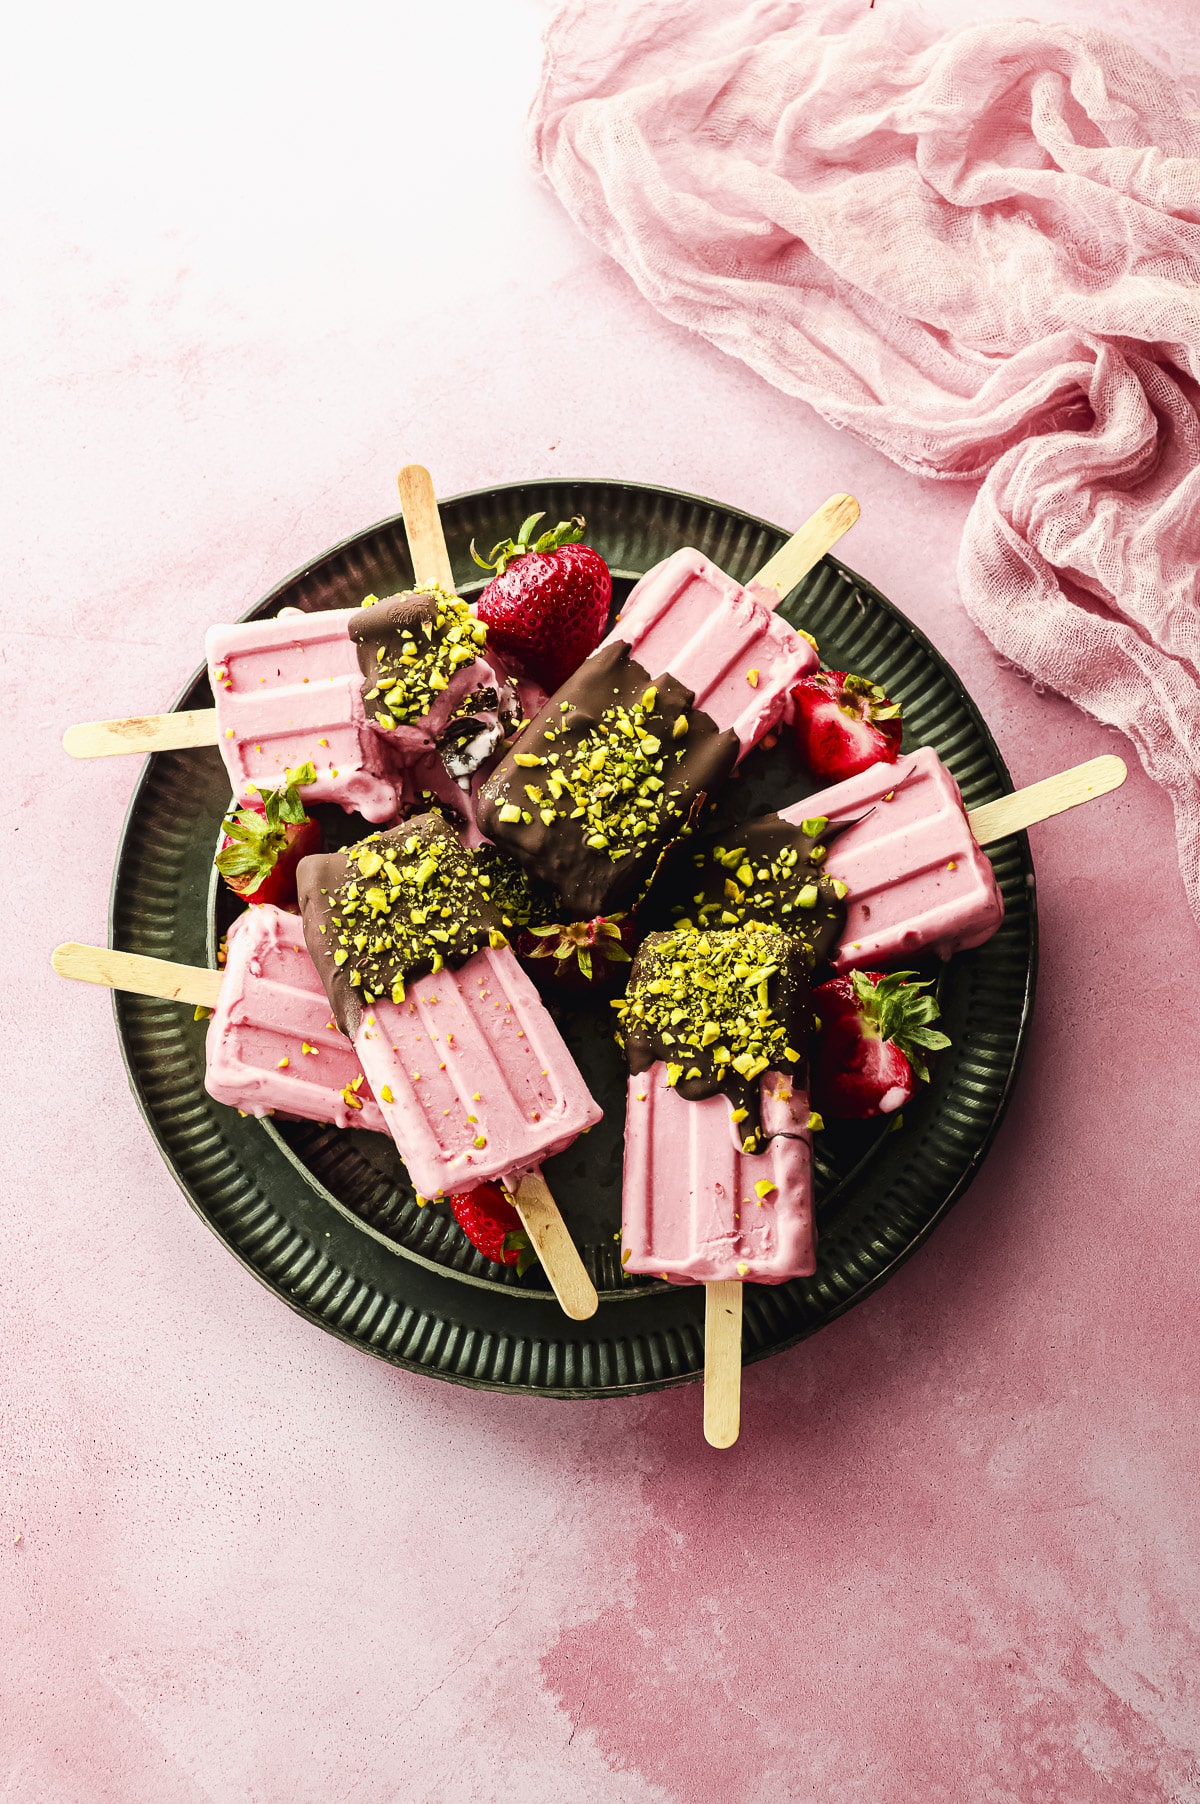
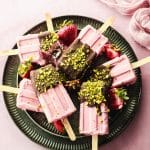
When you want an ice-cold dessert but really want a no-bake Strawberry Cheesecake that won't heat up your kitchen in the making -- that's when you need to try our recipe for Strawberry Cheesecake Popsicles. We dipped our popsicles in dark chocolate and covered them with chopped pistachios to give them some crunch and make them extra decadent. This frozen summery dessert is seriously amazing and perfect for the next hot summer day when nothing but cold, cold, cold will do.
Ingredients for Strawberry Cheesecake Popsicles
The beautiful thing about this recipe is you get all the flavors you love without butter, eggs, an oven, or even a springform pan. This recipe is so cool!
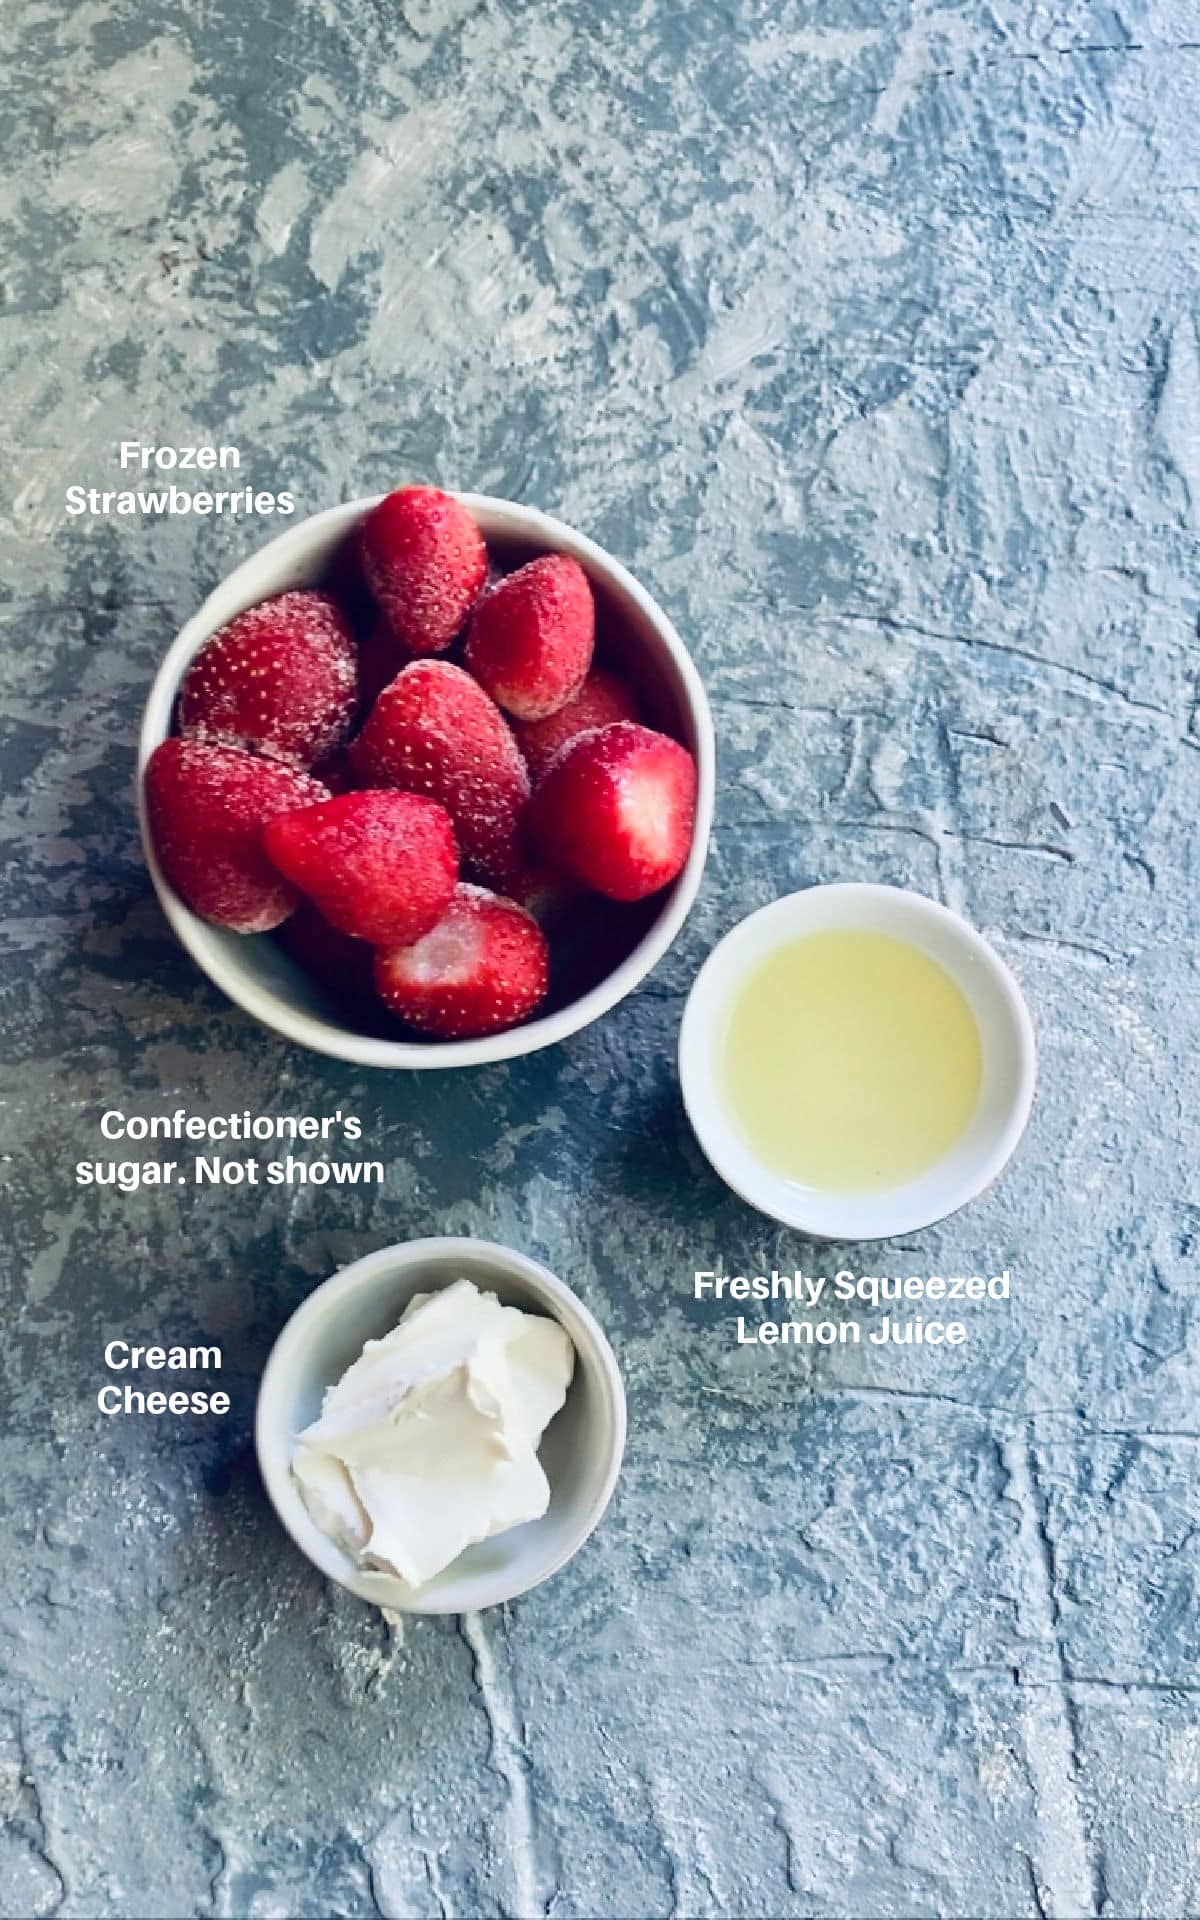
Cheesecake Filling Ingredients
- Cream Cheese. We used a block of cream cheese for this recipe. You could use vegan cream cheese if you are vegan or allergic to dairy.
- Frozen Strawberries. We found that this recipe comes out better when we use frozen strawberries for the mixture and fresh strawberries or strawberry puree as an add-on.
- Confectioner's Sugar. This is the same as Powdered Sugar. The cornstarch that is found in confectioners' sugar gives these popsicles a great texture.
- Lemon Juice. Adds brightness and enhances the strawberry flavor.
- Salt. You just need a pinch to intensify the flavors.
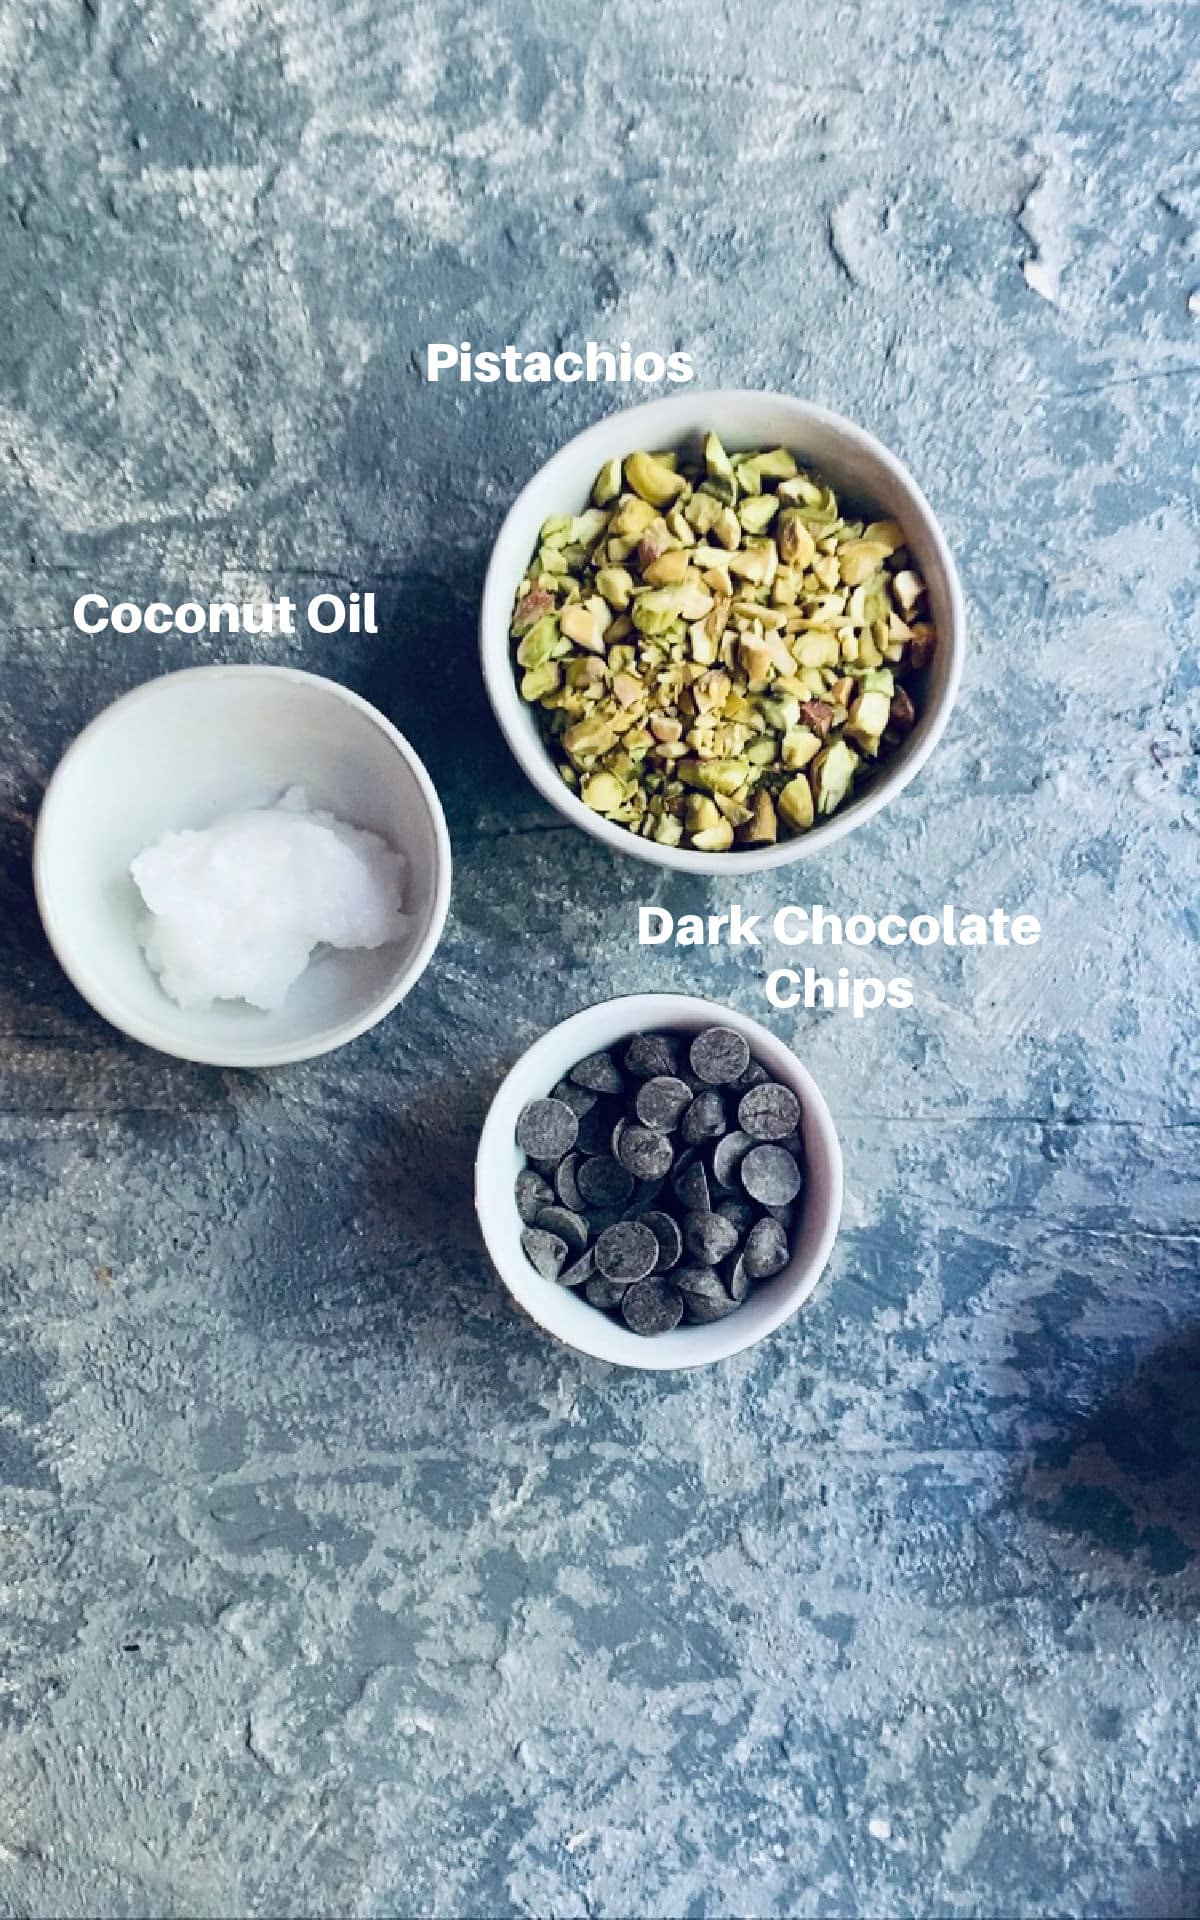
Ingredients for the Chocolate Topping
- Dark Chocolate Chips: they provide a nice contrast to the sweetness of this frozen treat.
- Coconut Oil. This will help the chocolate form a smooth and beautiful coating while still hardening on your strawberry cheesecake popsicle.
- Pistachios. You can use raw or roasted. Roasted will have a more intense flavor. Your pistachios will need to be shelled and chopped. Be aware that you can buy many different flavors at the store, and make sure what you purchase will pair well with strawberry cheesecake. Plain or lightly salted is probably best.
How to Make Strawberry Cheesecake Popsicles
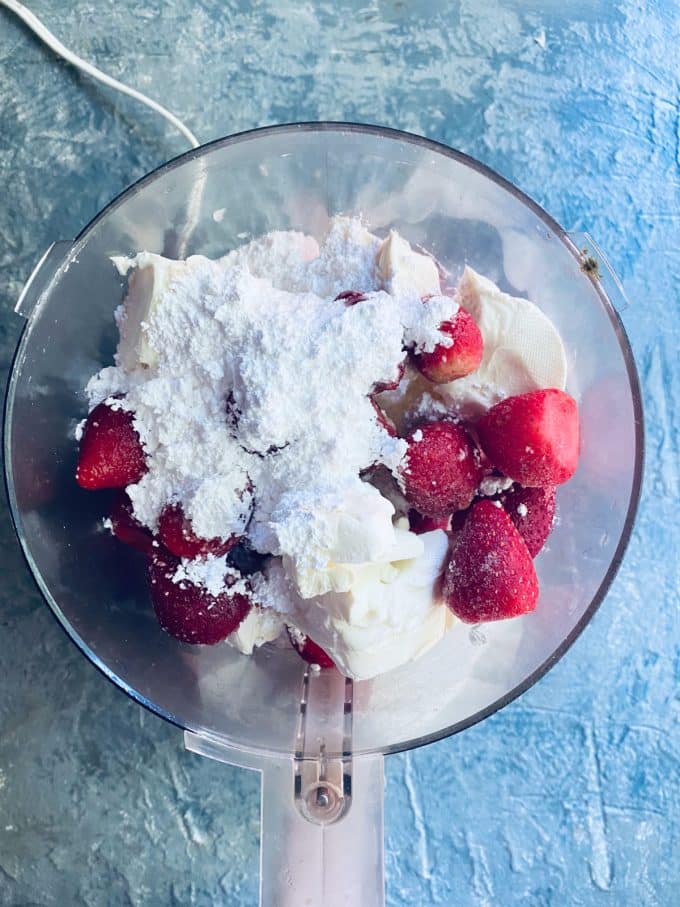
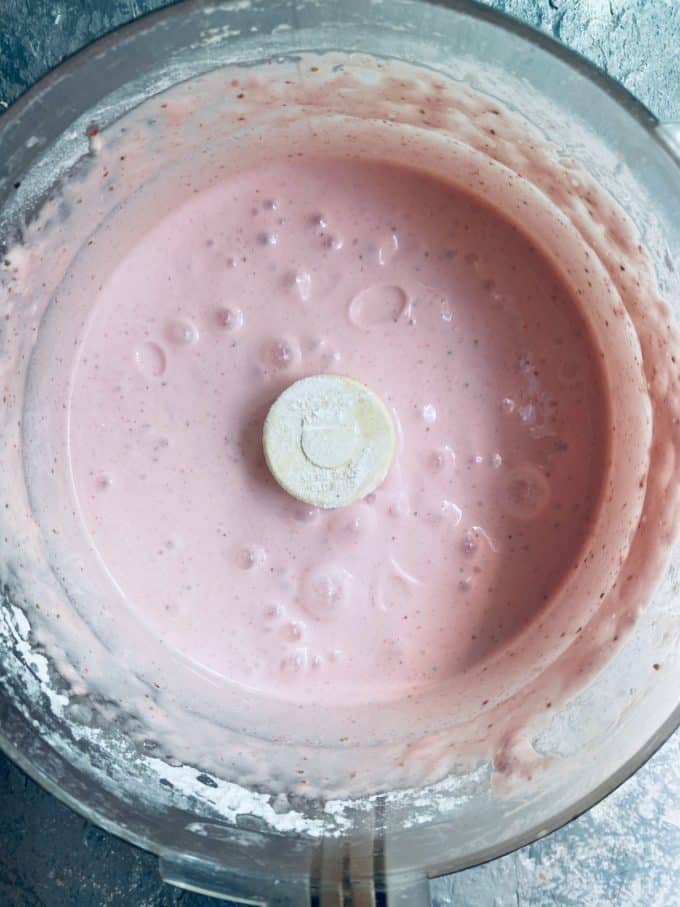
Making our no-bake strawberry cheesecake on a stick is incredibly easy. First blend the cream cheese, frozen strawberries, sugar, and lemon juice in a food processor.
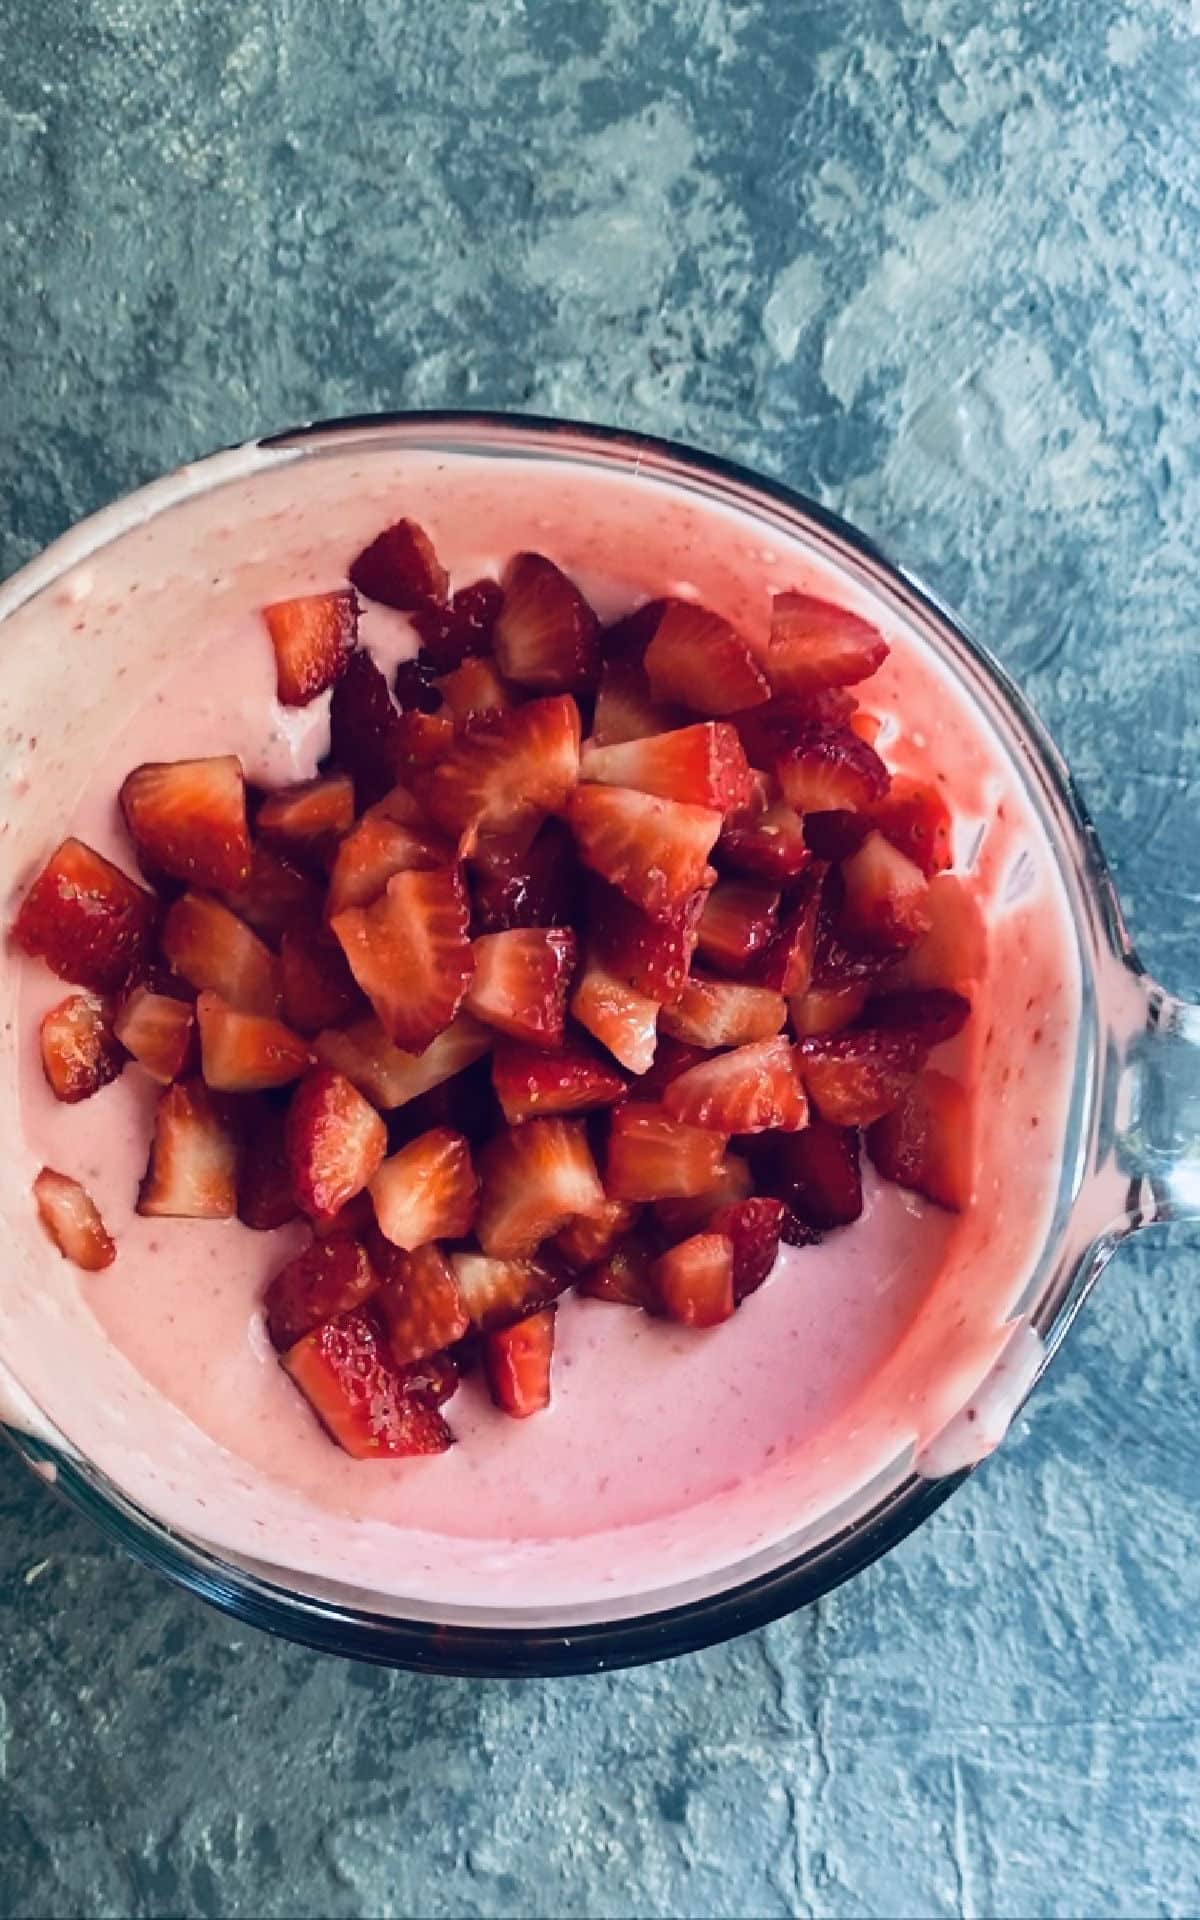
When you get it really smooth, add some chopped fresh strawberries.
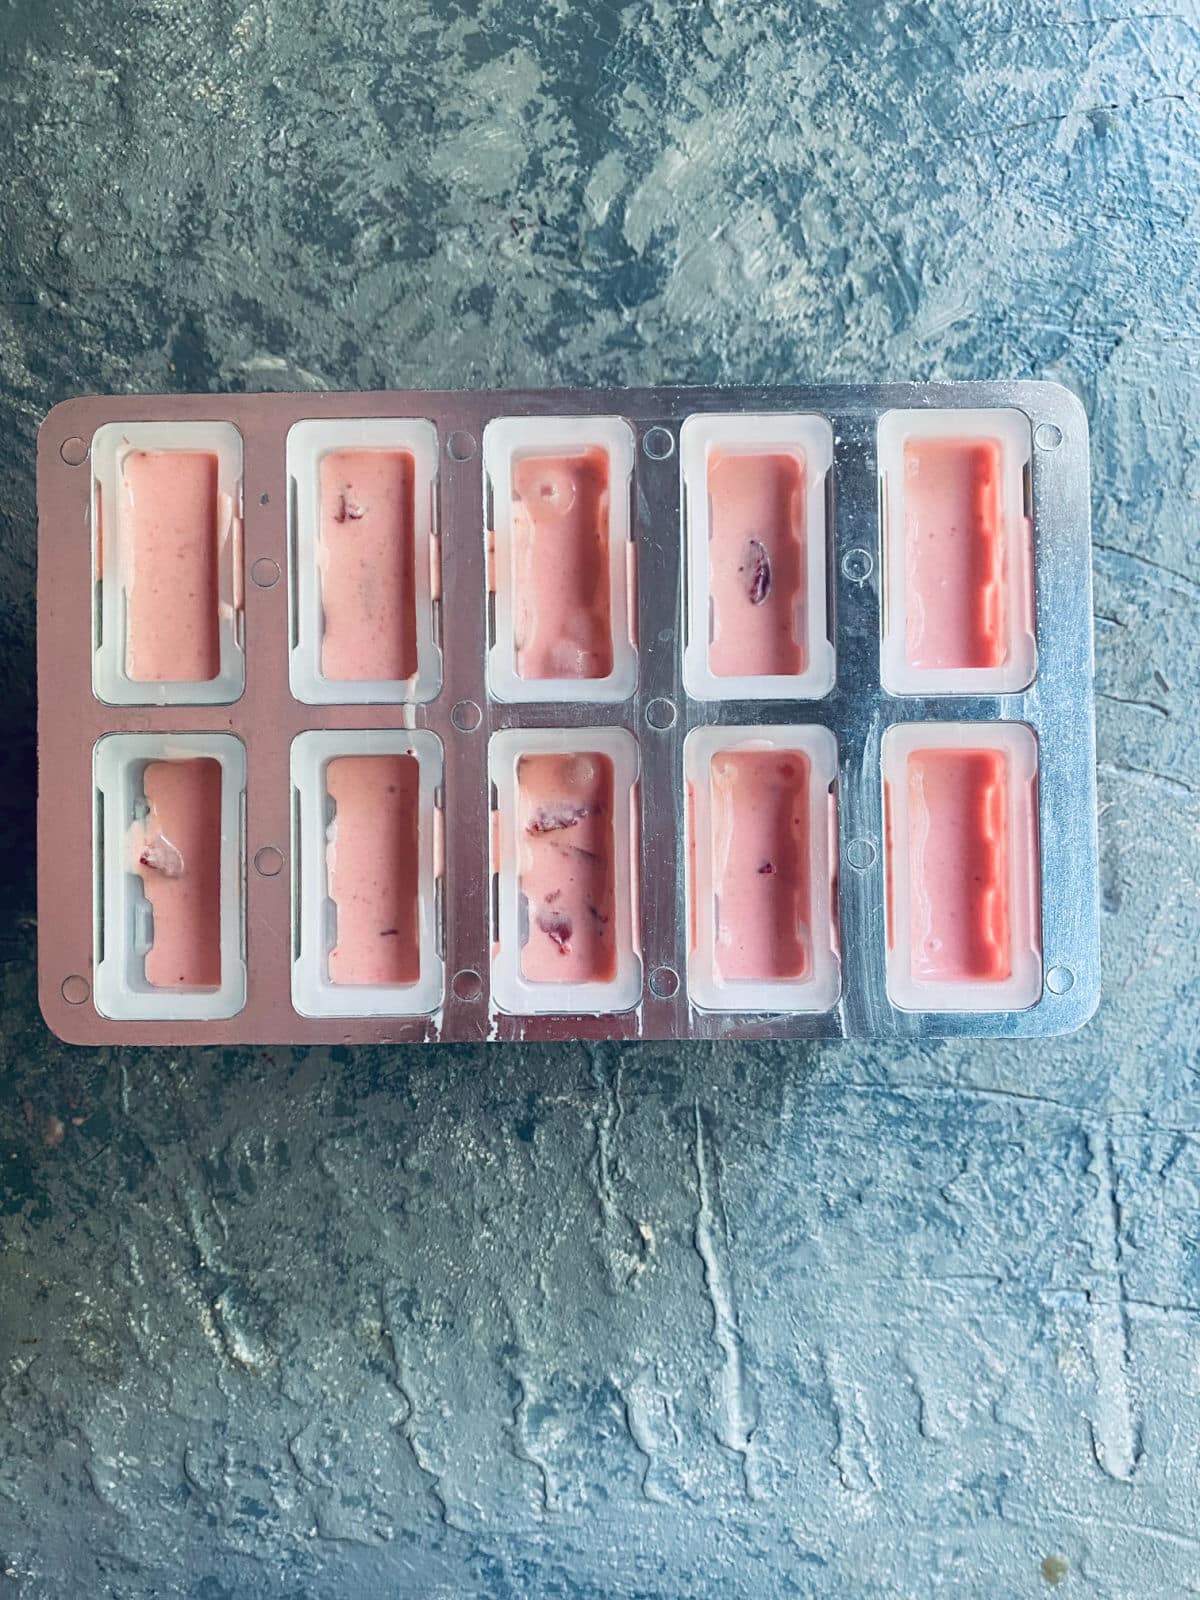
Pour the mixture into popsicle molds, and pop them in the freezer.
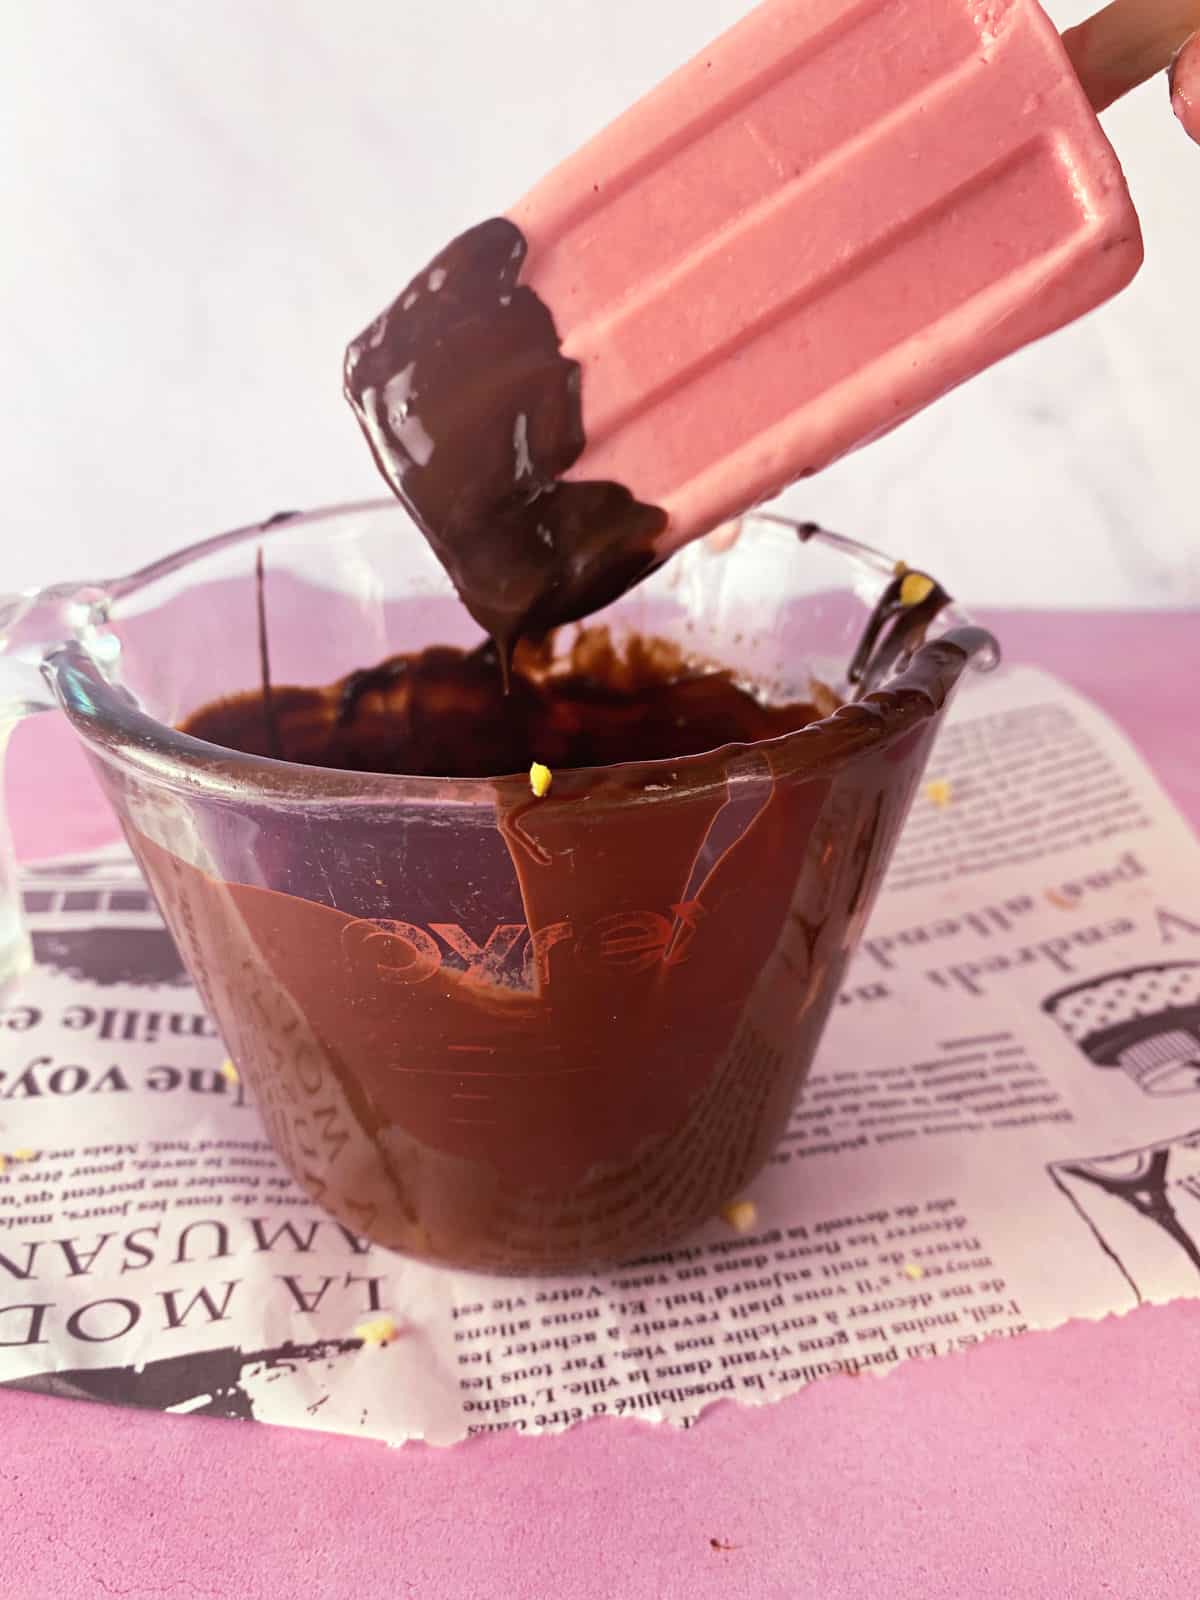
When the popsicles are fully frozen inside those molds, melt the chocolate chips. Once melted, stir in the coconut oil. Dip each popsicle in chocolate and sprinkle chopped pistachios on top before the chocolate hardens. Since these things are already cold, you may need to work with a partner to make sure you can work fast enough to get pistachios on before the chocolate sets.
Once dipped, place each popsicle on a parchment-lined baking sheet. Move this back to the freezer so that the chocolate will fully harden. Give them a chance to freeze up and then you can move them gently to an airtight container and keep them in the freezer for three or four months or serve them right away to family, friends, and guests. Remember to save one for yourself because you don't want to miss out on this treat!

Tips for the Best Strawberry Cheesecake Popsicles
It will take about four hours for the popsicles to set in the popsicle molds and hold their shape. If you have molds with lids that allow you to place the popsicle sticks in the center, that is ideal. Remove the popsicles from the molds very carefully so that you can be sure they are fully frozen before dipping them in melted chocolate.
It's really easy to melt chocolate chips in the microwave. Place them in a glass bowl and start with twenty seconds. After twenty seconds, stir the chips. Try another twenty seconds and stir the chips again. If they have started to melt, which you cannot tell until you stir, add a mere ten seconds more and see if that is enough. You don't want to overcook the chocolate or it will start to clump back up, so it is always best to go slow. You want the chocolate melted enough to completely lose its shape and dip easily.
Setting the strawberry cheesecake popsicles out at room temperature for a few minutes will make them easier to pop out of the molds. I do not recommend running the molds under hot water to unmold them unless you are desperate and have a three your old hanging onto your leg begging. If you use hot water, move fast.
Use a rolling pin and a sealed plastic baggie with the air squeezed out to crush your pistachios or other toppings.
You can use parchment paper or waxed paper to line your baking sheet after dipping the popsicles in chocolate. Do not use aluminum foil because it will give your treats a metallic taste.
The cream cheese will be easier to work with if you pull it out of the fridge a couple of hours before you are ready to start mixing.
How to Store Strawberry Cheesecake Popsicles
Obviously, these will need to stay frozen but you have a few options if you have any leftovers. Once you freeze each dipped popsicle individually, you can move them to a large airtight plastic container with a lid and keep them that way. Or, you can use a gallon-sized plastic zipper bag of freezer quality and place them down inside. Remove the excess air each time you reseal the bag. One other option is to give each popsicle its own individual bag for storage. These popsicles should keep for three to four months in your freezer.
Variations for this Recipe
Instead of pistachios, you could use crushed wafer cookies, crushed ice cream cones, graham cracker crumbs, (to mimic the graham cracker crust), or a different nut such as crushed almonds, pecans, or walnuts.
You could switch up the fruit in this recipe. Try blueberries, raspberries, blackberries, or your blend of smoothie fruits. I would probably avoid bananas for this particular recipe.
If you aren't a fan of chocolate, try dipping the popsicles in white chocolate chips, or your favorite yogurt.
More Great Strawberry Recipes
The best thing about this recipe is that it uses real, natural flavors straight from the fruit to create something incredibly tasty. We have quite a few other strawberry recipes that do a great job of keeping it pure. Try one of these:
- Strawberry Agua Fresca
- Fig and Strawberry Breakfast Muffins
- Quinoa Spinach Salad with Strawberries
- Yogurt Banana Strawberry Muffins
Our strawberry cheesecake recipe is a bit unconventional but oh-so-good. It hits all the notes you are looking for without the traditional stress. Tell us what you think in the comments!
Other Popsicles You May Enjoy
What Inspired This Recipe
One of the things that make creating recipes fun is that you can mess up the recipe and still come up with something good. As long, of course, as you're creative and flexible enough to be willing to change gears!
Take this recipe as an example. Back in 2014 when we created this recipe. Our initial idea was to create something completely different. We were going for a lemon bar sort of thing, but we wanted to twist it by adding some strawberries.
Well, that didn't work out too well. Our filling turned out way too runny and we knew it would never work for a bar even though it tasted very good!
That's when the idea of a popsicle popped into our heads!
Since we were working with cream cheese to create our strawberry bar, we thought it would give us the perfect texture for a creamy, fruity popsicle. A refreshing, satisfying cold treat!
Popsicles are probably one of the easiest treats to make. They can be creamy or icy (ice pop). They can be fruity or chocolaty. Either way, you don't have to worry about h churning it, scraping it, or using an ice cream maker. Just mix, pour, and freeze!
Strawberry Cheesecake Popsicles
- Total Time: 5 mins
- Yield: 10 popsicles 1x
- Diet: Vegetarian
Description
A refreshing and decadent treat, perfect for a hot summer day!
Ingredients
- 8 oz block of cream cheese ( 1 block)
- 1 cup frozen strawberries
- 1 ¼ cups confectioner's sugar
- 2 tbsp lemon juice
- Pinch of salt
- 2 cups diced fresh strawberries
- 1 cup vegan chocolate chips
- 1 ½ tbsp coconut oil
- 1 cup chopped, shelled pistachios ( raw or roasted)
Instructions
- Combine cream cheese, frozen strawberries, sugar, and lemon juice in a food processor. Pulse until smooth and creamy.
- Mix in the fresh and stir well. Pour mixture into a popsicle mold and freeze until set (3-4 hours).
- Once the popsicles are ready, melt the chocolate chips with the coconut oil (you can do it in the microwave, at 20-second intervals, stirring after each 20 seconds).
- Line a tray with wax or parchment paper. Dip each popsicle in chocolate halfway, and sprinkle chopped pistachios on top. Carefully place them on the lined tray. Freeze until ready to serve
- Once Frozen the popsicles can be placed in an air-tight container or bag.
Notes
Post originally published on July 23, 2014
- Prep Time: 5 mins
- Freeze Time: 4 hours
- Category: Dessert
- Method: raw
- Cuisine: Kosher / Vegan
Nutrition
- Serving Size:
- Calories: 314
- Sugar: 23.6 g
- Sodium: 88.2 mg
- Fat: 20.1 g
- Saturated Fat: 9.7 g
- Trans Fat: 0 g
- Carbohydrates: 30.6 g
- Fiber: 3.4 g
- Protein: 4.9 g
- Cholesterol: 23.7 mg

cindele
Insanely gorgeous and delicious!!!!! What a great idea for wowing guests at a shower or summer party!
Vicky & Ruth
Thank you Cindy, it means a lot to us coming from a Super Host like you!
Melissa {lilmisscakes}
These are gorgeous! I love how you use vegan ingredients in such creative ways.
Vicky & Ruth
Thank you Melissa! We love making things Vegan, it is one of our most fun challenges!
Arpita@ The Gastronomic Bong
Wow!! These popsicles look amazingly delicious. .. yumm!!
Vicky & Ruth
Thank you Arpita!
Jamie Geller
Love how this looks and love your nail polish 🙂
Vicky & Ruth
And it taste great as well! My daughter is the hand model, with the pretty nail polish 🙂
Alex 'the Kosherologist'
Looks awesome....really like the pistachio edge to this recipe
Vicky & Ruth
Everything gets better with chocolate and pistachios 🙂
Consuelo - Honey & Figs
What a brilliant idea! I bet that these popsicles taste luscious. And the color is super cute too!
Vicky & Ruth
Thank you Consuelo, they taste really fantastic and the chocolate and pistachios make these popsicles even better!
Ronnie Fein
Oh gosh, ADULT popsicles! LOVE THESE. They jump right off the page and I wish I had one right now.
Vicky & Ruth
Come on over, I think we still have one left 🙂
Couldn't Be Parve
What a beautiful popsicle! I love the look of the green pistachios, dark chocolate, and pink strawberry.
Vicky & Ruth
Thank you Shoshana! They are very refreshing as well and parve!
Kelly
These popsicles are so pretty! Love that you used vegan ingredients too - such a wonderful and delicious idea:)
Vicky & Ruth
Thanks Kelly!
Sarah Klinkowitz
Look at that pistachio crust! I love how you used the vegan cream cheese
Vicky & Ruth
It really gives the pops a nice rich creaminess and the pistachios give just the right amount of crunch! 🙂